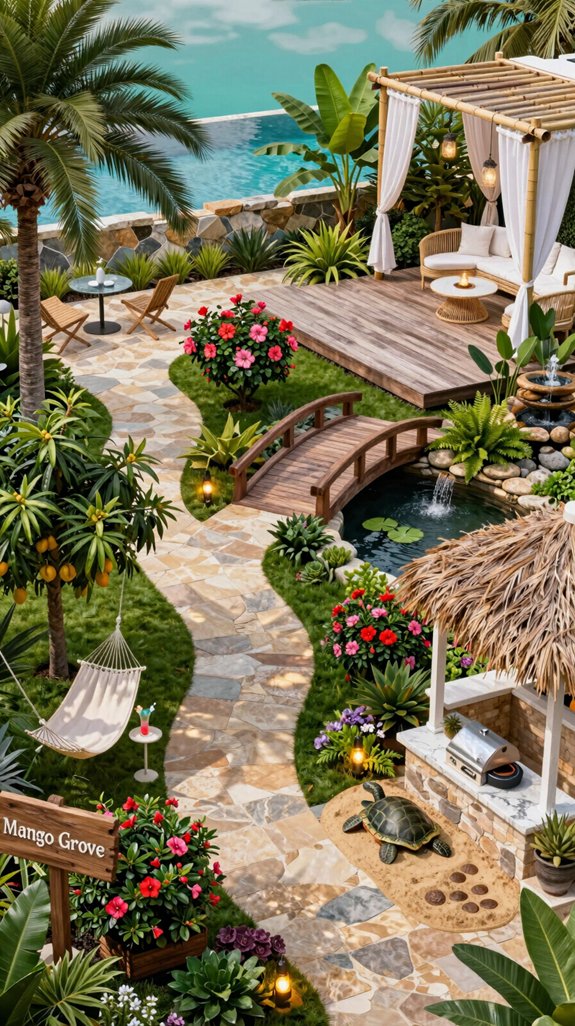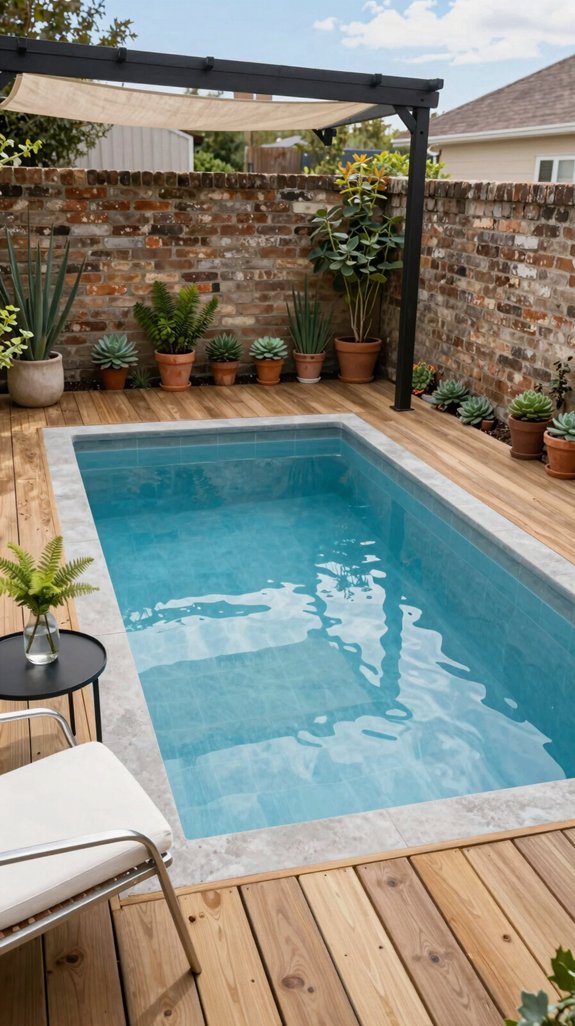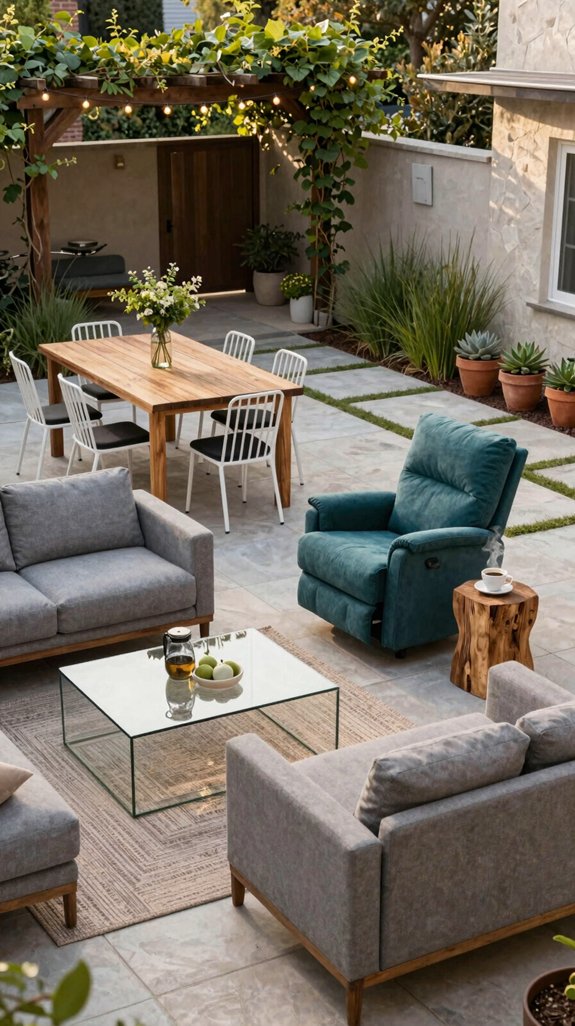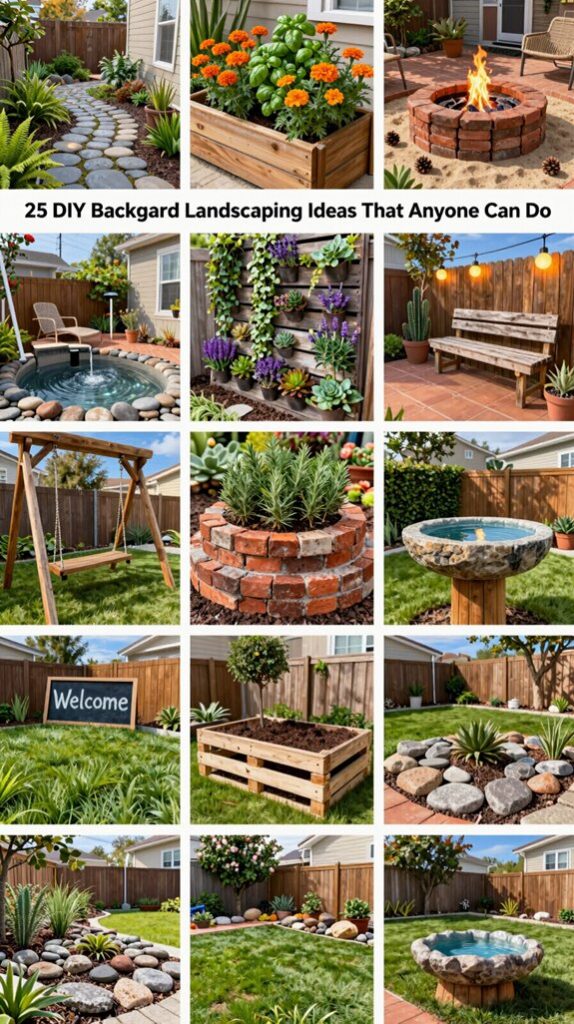
You can transform your backyard with simple, durable projects like a cedar‑raised garden bed, a curved gravel path, a recycled‑material fountain, and a stamped concrete patio. Add a wooden deck border for clean edges, a compact outdoor kitchen with a portable grill, and decorative boulders to define zones. Install a rain garden to manage stormwater and attract wildlife, then personalize the space with stenciled stepping stones or a custom sign. Keep reading to discover the full 25‑step guide.
Create a DIY Backyard Raised Garden Bed
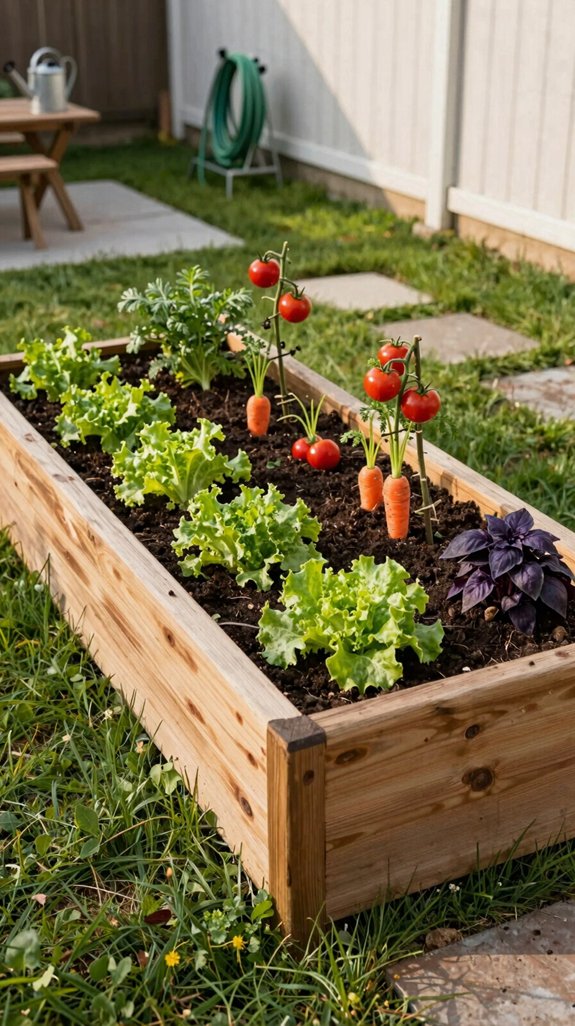
By stacking sturdy lumber and filling it with quality soil, you’ll create a raised garden bed that maximizes space, improves drainage, and adds a clean, modern line to your backyard. Choose rot‑resistant cedar or composite boards, cut them to a 12‑inch height, and secure with stainless‑steel brackets for structural integrity. Integrate a hidden irrigation manifold, using drip tubing and pressure‑compensating emitters to deliver uniform moisture. Line the interior with a permeable fabric to prevent soil loss while allowing root expansion. Finish with a sleek, low‑profile cap that doubles as a walking ledge, merging function with contemporary aesthetics for an innovative outdoor workspace. Keep your garden bed and surrounding outdoor surfaces pristine by using effective cleaning solutions to remove dirt, algae, and debris from hardscaping elements and structural components.

Elevate Your Garden - Opt for a brilliantly engineered raised garden bed to revolutionize your gardening. Its spacious design, measuring 48x24x30 inches, allows for the cultivation of multiple vegetable varieties alongside a plethora of herbs, optimizing your gardening space for ease and diversity.

BUILT TO LAST: Made of natural Chinese Fir wood to provide a gardening solution constructed to last through every season without discoloring or breaking down over the years

Spacious and Practical Design: 8-foot garden bed provides ample space for plants to grow with an included liner to separate the wood from the soil and keep it in excellent condition
Build a Curved Gravel Path for Visual Flow
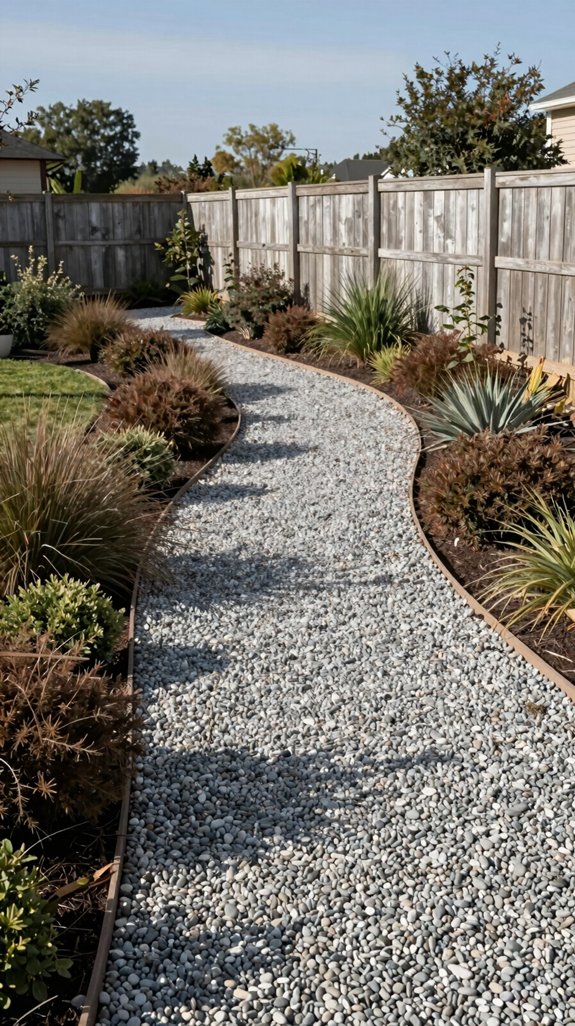
When you lay out a curved gravel path, start by mapping the desired flow with a flexible hose or garden rope, allowing the line to glide naturally around existing features. Next, excavate a shallow trench, maintain uniform depth, and line it with landscape fabric to prevent weed intrusion. Choose angular‑graded basalt or recycled glass aggregate for tactile contrast and drainage efficiency. Compact the base using a plate compactor, then spread gravel evenly, employing a screed board for consistent thickness. Integrate subtle edging—metal or reclaimed timber—to define borders and minimize displacement. Consider adding integrated lighting fixtures along the path edges to illuminate the walkway during evening hours. Finally, test the curve’s visual continuity from multiple viewpoints, adjusting as needed for seamless movement through the space.

Practical 6FT Wooden Pathway: The pathway measures 6ft(L)17inch(W), to be a nice rustic paver decoration of your garden, and flexible enough to fit any ground, such as sandy beaches, gravel roads, grassy lawn etc. It can help keep your feet clean and dry away from dirt, grass, and sands
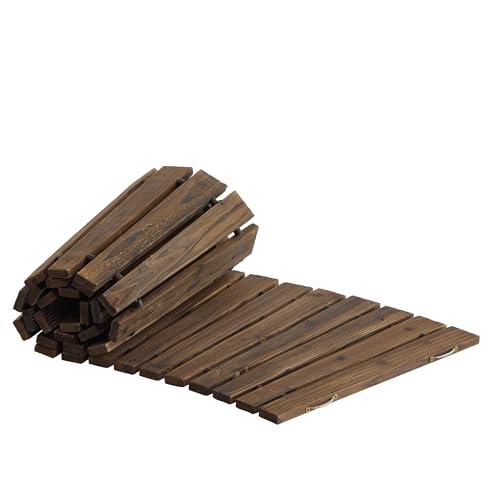
VERSATILE DESIGN: Roll-out wooden walkway that can be laid in curved or straight configurations for garden paths, beach access, or special event walkways
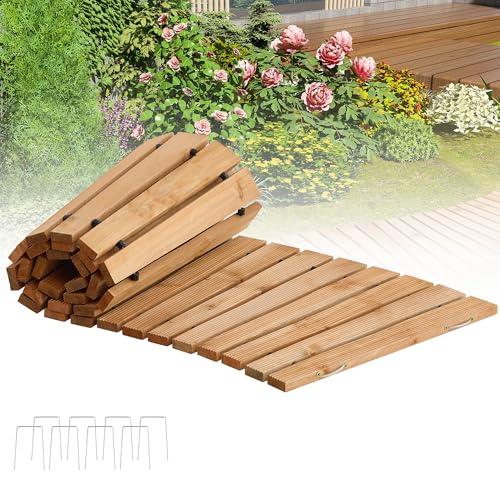
VERSATILE DESIGN: Roll-out wooden walkway that can be laid in curved or straight configurations for garden paths, beach access, or special event walkways
Install a Low‑Cost Recycled Fountain Water Feature
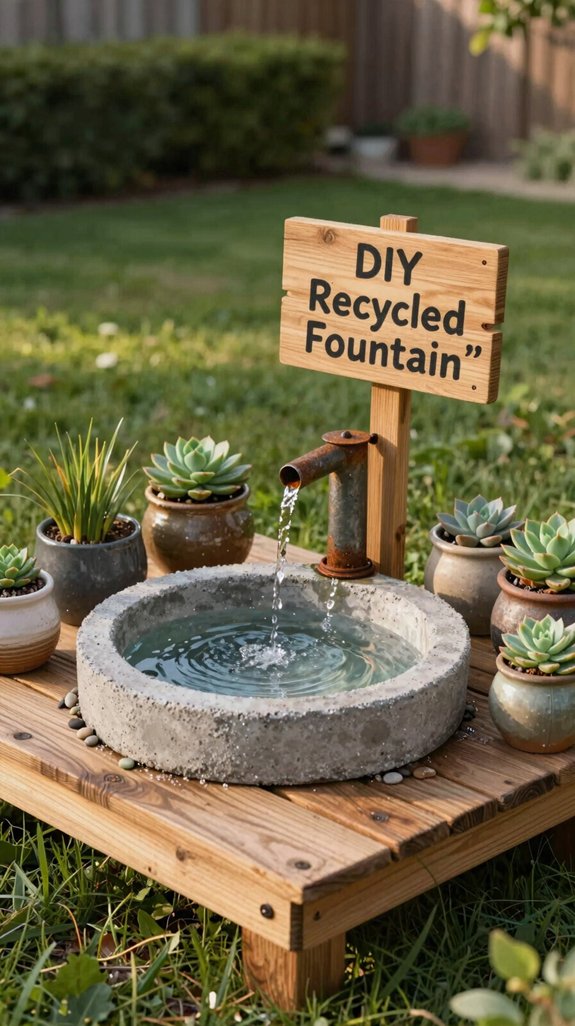
After shaping the curved gravel path, you can enhance the garden’s ambience with a low‑cost recycled fountain. Start by salvaging a durable plastic or metal basin; drill a 1‑inch inlet and outlet for tubing. Connect a submersible pump, sourced from an old aquarium, to a reclaimed garden hose, securing clamps to prevent leaks. Position the basin on a level concrete pad, then route the hose through a decorative stone ring for visual integration. Adjust flow rate with a simple valve, achieving a gentle cascade that reflects light. This system recycles water, reduces electricity consumption, and adds kinetic elegance without overwhelming budget or maintenance. When designing your fountain area, ensure all materials and sealants are safe for pets and children who may play nearby in your yard.

Made with Recycled Materials: A blend of recycled plastic, stone powder, and wood dust, PSW Pots are eye-catching and long-lasting for mindful gardening.

Made with Recycled Materials: A blend of recycled plastic, stone powder, and wood dust, PSW Pots are eye-catching and long-lasting for mindful gardening.

Made with Recycled Materials: A blend of recycled plastic, stone powder, and wood dust, PSW Pots are eye-catching and long-lasting for mindful gardening.
Lay a DIY Stamped Concrete Patio for Durable Flooring
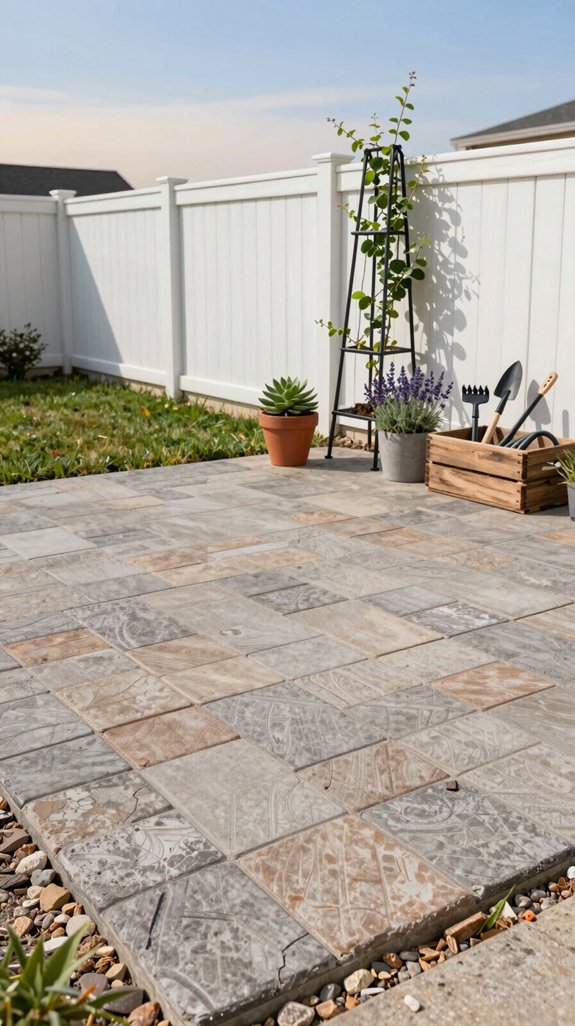
If you want a patio that’s both sturdy and visually striking, start by preparing a well‑compacted subbase of crushed stone and sand, then install a reinforced concrete slab before shaping the surface. Next, apply a liquid concrete admixture with polymer fibers for tensile strength, then smooth to a uniform thickness. While still pliable, embed a textured stamp—brick, slate, or geometric pattern—using a rubber mold and light pressure. Immediately wipe excess, then cure under controlled humidity for 48 hours. Finish with a penetrating sealant that enhances color depth and resists UV, stains, and moisture, delivering a resilient, high‑design flooring solution. Consider incorporating coordinated home scent sets to enhance your outdoor entertaining space and create a multisensory experience for guests.

2 pieces a set: size-40*40*3.5cm/15.7*15.7*1.4in,you will receive 2 pcs Beautiful patterns Square concrete mold for for you to exchange and use making Pavement Stone,paver molds is reusable.

2 pieces a set: size-40*40*3.5cm/15.7*15.7*1.4in,you will receive 2 pcs Beautiful patterns Square concrete mold for for you to exchange and use making Pavement Stone,paver molds is reusable.

Stop Worrying About Missing Parts: Unlike many kits that only provide a single-use mold and no decorations, our set includes 5.5 Lb cement mix, a mold, 7oz of vibrant mosaic tiles, 3 carving tools, letter & number stamps, a waterproof mat, and a pairs of glove
Construct a Simple Wooden Deck Border for Clean Edges
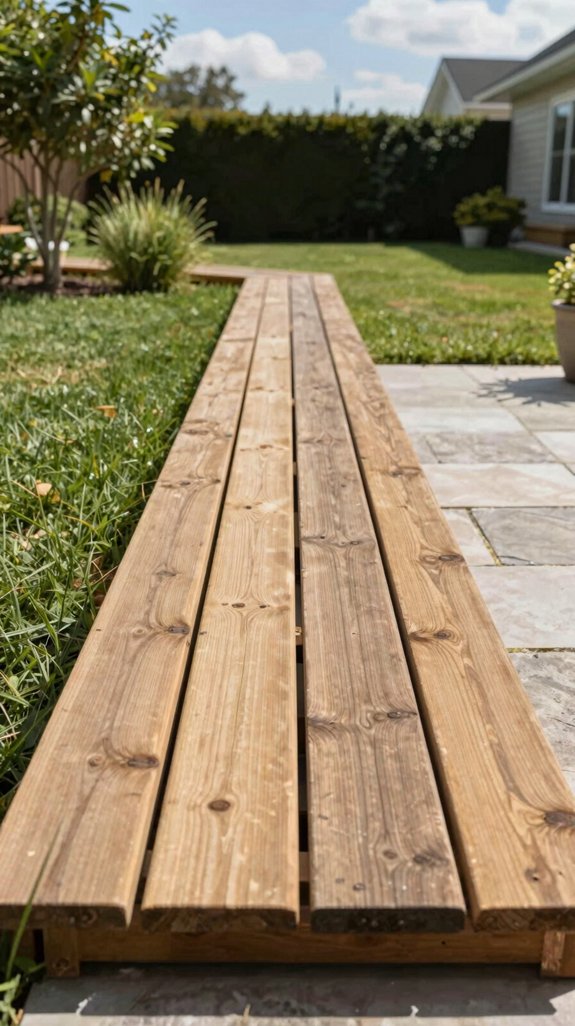
A well‑finished stamped‑concrete patio looks even sharper when framed by a crisp wooden border that defines the edge and protects the surrounding soil. First, measure the perimeter, then cut pressure‑treated 2×4s to length, accounting for a ¼‑inch overlap at corners. Drill pilot holes, drive stainless‑steel deck screws, and stagger joints for structural integrity. Apply a weather‑resistant sealant to prevent rot, and embed a low‑profile drainage channel beneath the border to divert water away from the concrete. To maintain the area long-term, periodically inspect the border and surrounding soil for mold prevention signs and clear any debris that could trap moisture. Finish with a matte polyurethane for a sleek, modern look that enhances visual continuity while preserving the patio’s durability and clean lines.

PORTABLE STORAGE - The included carrying case helps you keep each utensil in its place and also makes it easy to take the entire set of BBQ accessories along on a camping trip.

Duel Fuel - Compatible With Both Butane (Fuel Not Included) And Propane Fuel (Fuel Not Included), Operates On A Single Butane Cartridge 8 Oz Or A Propane Cylinder 16.4 Oz , Propane Converter Regulator Included

Freehiker brings you the ultimate outdoor utensil set, It is a complete and professional BBQ grill kit that will satisfy all your needs for cooking, perfect for travel, picnics, RVs, camping, hiking, backyard BBQ-ing, parties, concerts, sporting events, boat rides, mountaineering and more. BAG SPECS: 14.5” length, 9” width, 2” thick.
Repurpose Pallets Into a Rustic Outdoor Sofa
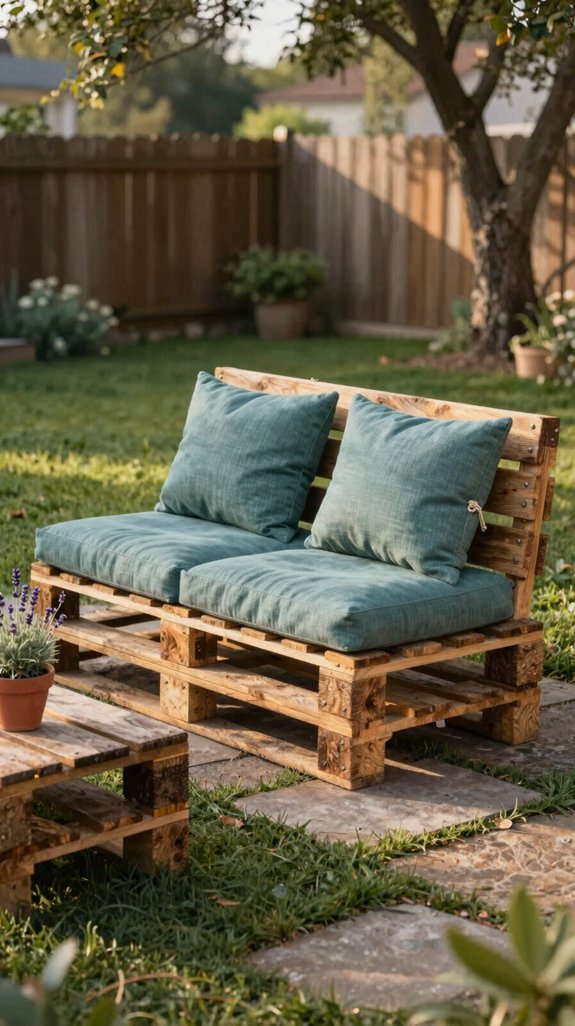
When you dismantle sturdy pallets and reconfigure their slats into a low‑profile frame, you create a rustic outdoor sofa that blends durability with visual warmth. First, measure and cut each pallet to a uniform 30‑inch depth, then reinforce corners with stainless steel brackets for structural integrity. Sand rough edges, apply a weather‑resistant sealant, and attach a slatted base using hidden screws to maintain a clean aesthetic. Add foam cushions covered in UV‑protected fabric, securing them with Velcro straps for easy removal. Integrate built‑in cup holders by routing shallow recesses into the side rails, enhancing functionality without compromising the sleek, industrial look.

16.5" deep to accommodate large, deep-rooted plants

LONG-LASTING: Made from rot resistant, 1" thick, North American Western Red Cedar

SPACIOUS PLANTING AREA:The 48"L × 24"W × 30"H raised garden bed provides ample space for vegetables, herbs, flowers, and fruits. Its spacious design supports healthy plant growth with a 300 lb weight capacity.
Use Mulch to Define a Cozy Seating Nook
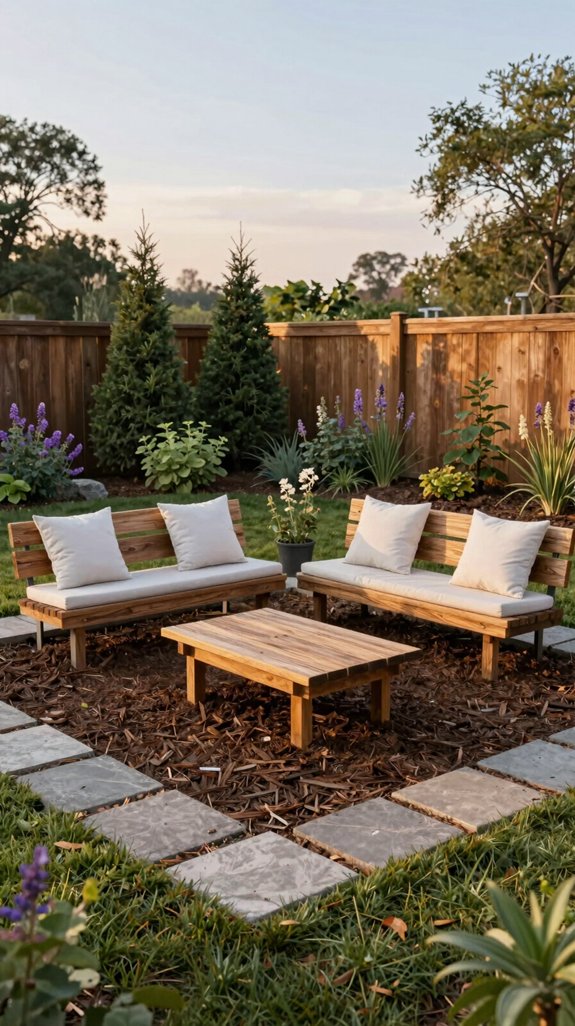
By laying a generous layer of natural mulch around your seating area, you instantly create a defined, inviting nook that feels both grounded and visually soft. Choose a mulch type—cypress bark, hardwood chips, or rubber granules—based on durability, color palette, and drainage properties. Spread a 3‑inch depth to stabilize soil temperature, suppress weeds, and cushion foot traffic. Integrate edging strips or low‑profile metal frames to maintain crisp boundaries and prevent spread. Pair the mulch with modular cushions and outdoor bistro tables for a seamless blend of function and aesthetic. Add LED strip lighting for enhanced ambiance and functionality. This low‑maintenance surface supports seasonal changes while highlighting the nook’s contemporary charm.

Generously Size:Measuring 6FT in length and 17 inches in width,these garden walkway provides a full 6' of length to let you cover more ground in an instant,brings sufficient area for you to walk through!This is the most convenient and cost-effective tool to create the elegant and exotic hardwood deck that you have always dreamed of!Design a multifunctional pathway,or charming landscape decor with our roll-out wood garden walk-way,add instant and rustic touch to your outdoor surroundings

【PRACTICAL WOODEN PATHWAY】The wooden garden path is flexible enough to fit any ground, even uneven ground, such as sandy beaches, gravel roads, and muddy roads; It can help you keep your feet clean and dry in wet weather, keeping dirt, mud and grass away from the soles of your shoes or barefoot

ADAPTABLE & AESTHETIC DESIGN: Our Hardwood Pathway effortlessly molds to any terrain, enhancing your garden with a natural, seamless look. Perfect for encircling plantings or defining borders. Can also be used for temporary events such as wedding party walkways or decorations. This parth rolls up for easy storage and measures 6 feet long, 17 inches wide, and 0.5 inches high.
Build a DIY Hammock Stand for Relaxing Evenings
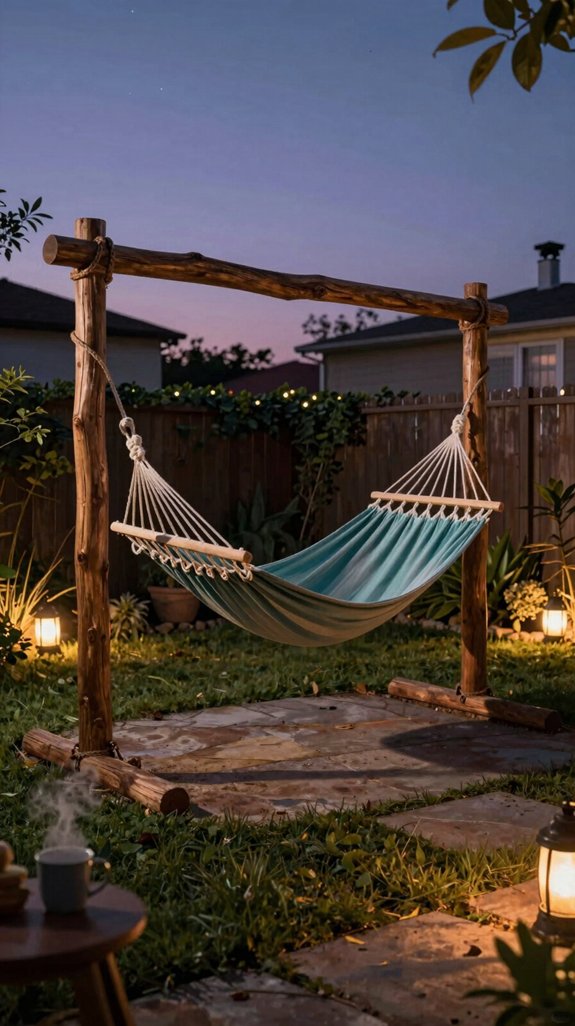
If you want a sturdy, eye‑catching spot for evening relaxation, start by selecting two 4‑by‑4 in. pressure‑treated lumber posts, each 8 ft tall, and embed them 2 ft deep in concrete footings with a 12‑inch diameter. Align the posts with a slight outward flare to increase stability and visual interest. Attach a galvanized steel crossbeam, 6 ft long, using stainless‑steel lag bolts, then sand the wood and apply a matte, weather‑resistant finish. Hang a breathable cotton‑blend hammock using heavy‑duty carabiners and quick‑release shackles. Incorporate LED rope lighting along the beam for ambient glow, ensuring the stand remains both functional and a focal design innovation. Consider adding streaming accessory sets nearby if you plan to record your relaxation sessions for content creation purposes.
Made with Recycled Materials: A blend of recycled plastic, stone powder, and wood dust, PSW Pots are eye-catching and long-lasting for mindful gardening.
Made with Recycled Materials: A blend of recycled plastic, stone powder, and wood dust, PSW Pots are eye-catching and long-lasting for mindful gardening.

Made with Recycled Materials: A blend of recycled plastic, stone powder, and wood dust, PSW Pots are eye-catching and long-lasting for mindful gardening.
Paint & Stain a Bench for Personalized Outdoor Seating
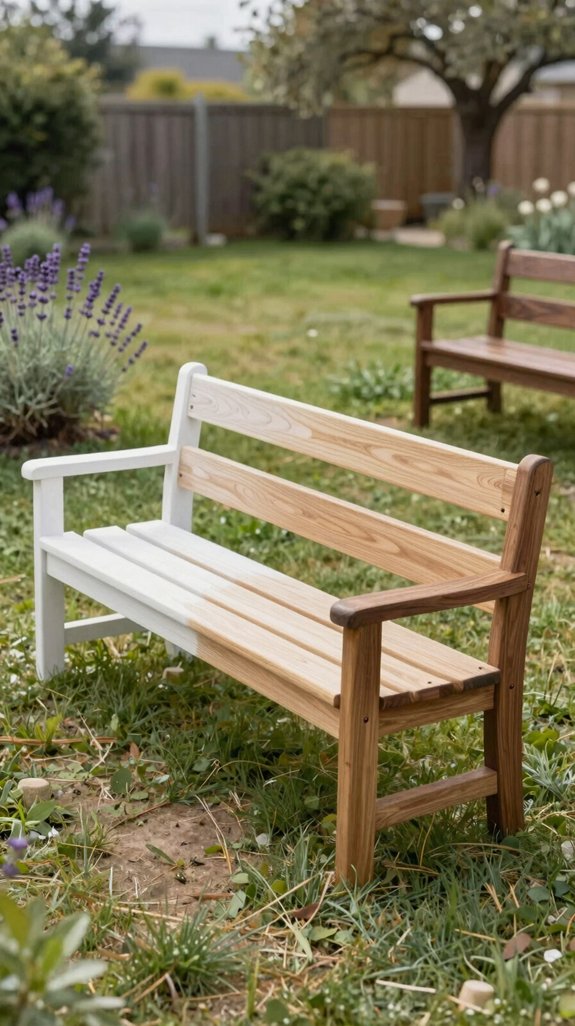
Choosing the right finish for your outdoor bench begins with evaluating the wood’s condition, the climate it will face, and the aesthetic you want. Sand the surface with 120‑grit paper, then wipe with a tack cloth to remove dust. Select a polyurethane‑based stain that embeds pigments while sealing against moisture; it offers UV inhibitors for sun‑exposed areas. Apply the first coat with a low‑nap brush, working with the grain to avoid pooling. Light‑sand between coats using 220‑grit, then add a final clear topcoat for gloss or matte, depending on your design language. Finish by curing for 24 hours before placement. For benches paired with other outdoor furniture, consider ensuring your seating arrangements rest on adjustable foundations that can accommodate various ground conditions and mattress types if you’re creating cushioned seating areas.

[DIY BOARD] This concrete board is design for DIY lovers, who want to decorate their garden road as they like, to give their pavement and yards some artistic sense.

Dimensions: 16" W x 16" D x 1.5" H

PAVING MOLD: Premium durable Plastic material, smooth and very easy to handle, requiring no professional skills
Add a Weather‑Resistant DIY Outdoor Rug
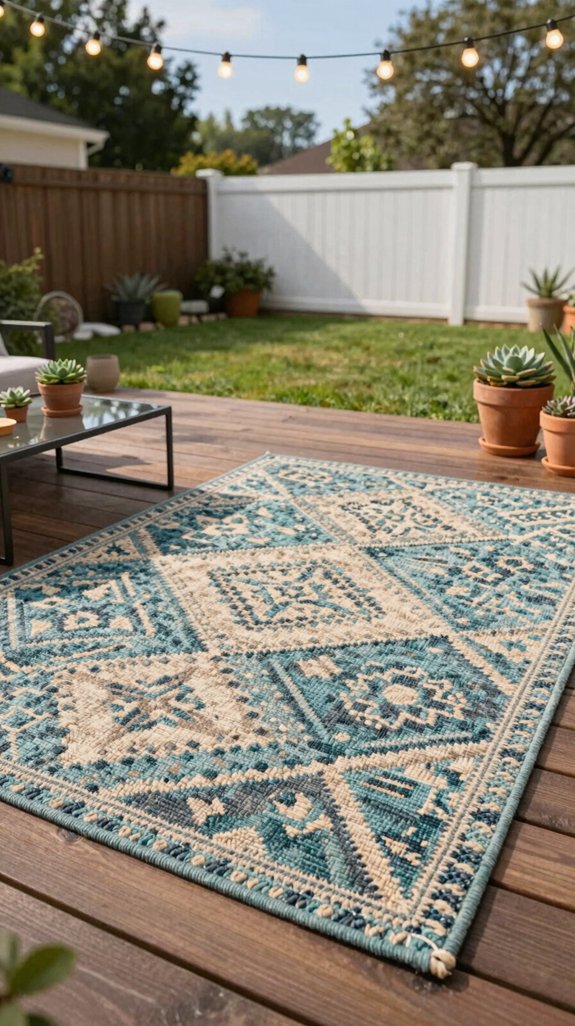
Your freshly stained bench now needs a surface that can handle sun, rain, and foot traffic without sacrificing style. Choose a high‑density polypropylene weave, then treat it with a UV‑blocking, water‑repellent spray for durability. Cut the fabric to exact dimensions using a rotary cutter and a self‑healing mat for clean edges. Sew reinforced double‑stitched borders with marine‑grade polyester thread to prevent fraying. Anchor the rug with hidden, rust‑proof stakes or a silicone‑based adhesive that grips concrete yet releases without damage. The result is a sleek, weather‑resistant layer that adds texture, color contrast, and functional protection to your backyard oasis. Complete your outdoor entertaining setup by incorporating ice buckets to keep beverages chilled during gatherings.

Mini Kitchen On-the-Go - Experience the convenience of a mini kitchen wherever you are. This portable kitchen kit includes essentials such as a spatula, serving spoon, knives, silicone spatula, tongs, and more, all neatly organized for comfortable outdoor dining.

Effortless Setup, Instant Grilling: On-The-Go prep table, no tools required! The portable grill table works instantly, perfect for your outdoor adventures, BBQs, camping, patios & parties. Stable and labor-saving, ready to cook.

Foldable & Portable Camp Stove - This foldable bucket design camping stove collapses into a compact unit for easy storage and transport. Perfect as a portable burner for outdoor cooking, hiking, and tailgating. Supports pots securely when fully extended.
Hang String Lights for Evening Backyard Mood
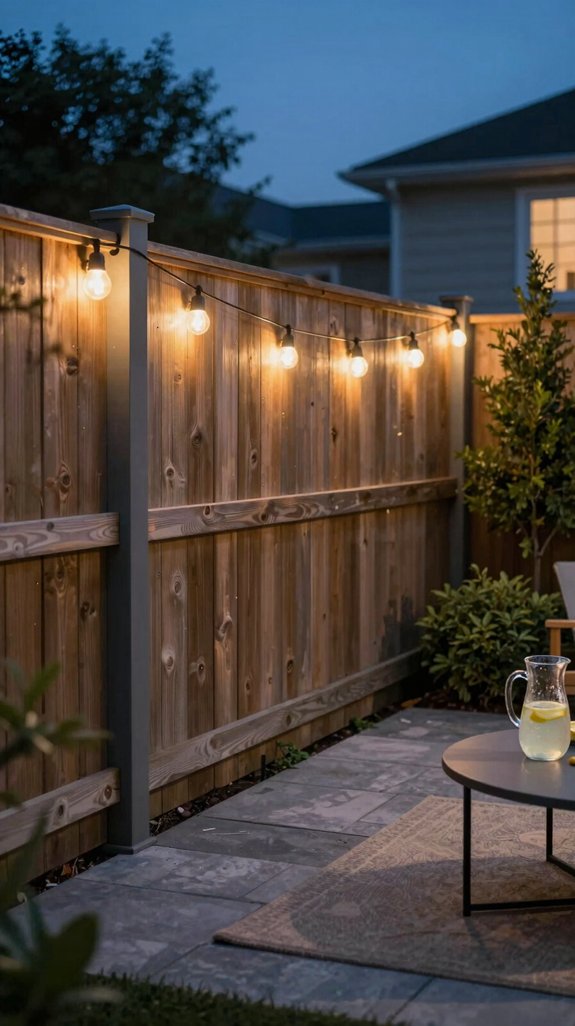
When twilight settles, drape LED string lights across the patio’s perimeter to create a warm, inviting glow while preserving energy efficiency. Choose weather‑rated, low‑voltage LEDs with a color temperature of 2700‑3000 K for cozy ambiance and minimal power draw. Mount hooks or magnetic clips at 12‑inch intervals, ensuring even spacing and structural integrity. Connect sections using waterproof connectors, then test voltage drop with a multimeter to confirm consistent brightness. Integrate a dimmer switch or smart controller for programmable scenes, allowing you to shift from subtle twilight to vibrant festivity. Consider pairing your outdoor lighting with viridian green wall tones on nearby structures to create a cohesive botanical aesthetic that extends from indoors to outdoors. This modular system balances technical precision, aesthetic appeal, and functional versatility.
Install Solar‑Powered Pathway Lights for Eco‑Friendly Glow
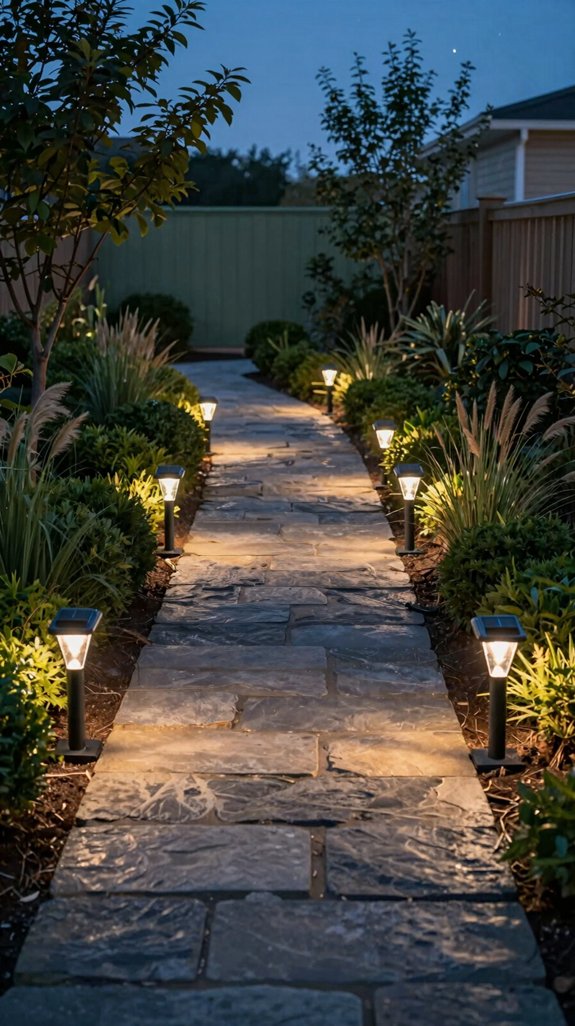
If you want a sustainable night‑time accent, install solar‑powered pathway lights that harvest daylight and automatically illuminate your walkways after dusk. Choose low‑profile, weather‑sealed fixtures with integrated photovoltaic cells and high‑efficiency LED modules. Position each unit 6–8 feet apart, aligning the solar panel toward the sun’s trajectory to maximize charge. Use adjustable mounting brackets to set a 30‑degree tilt, ensuring optimal exposure and minimal glare. Connect the lights to a smart controller that regulates brightness based on ambient light sensors, extending battery life while preserving a consistent, eco‑friendly glow throughout the evening. For additional daytime shade coverage, consider pairing your pathway lighting with UV-protective sun shade sails that enhance your outdoor living space. This setup blends cutting‑edge technology with sleek, functional design.
Choose the Right Power Source for Your String Lights
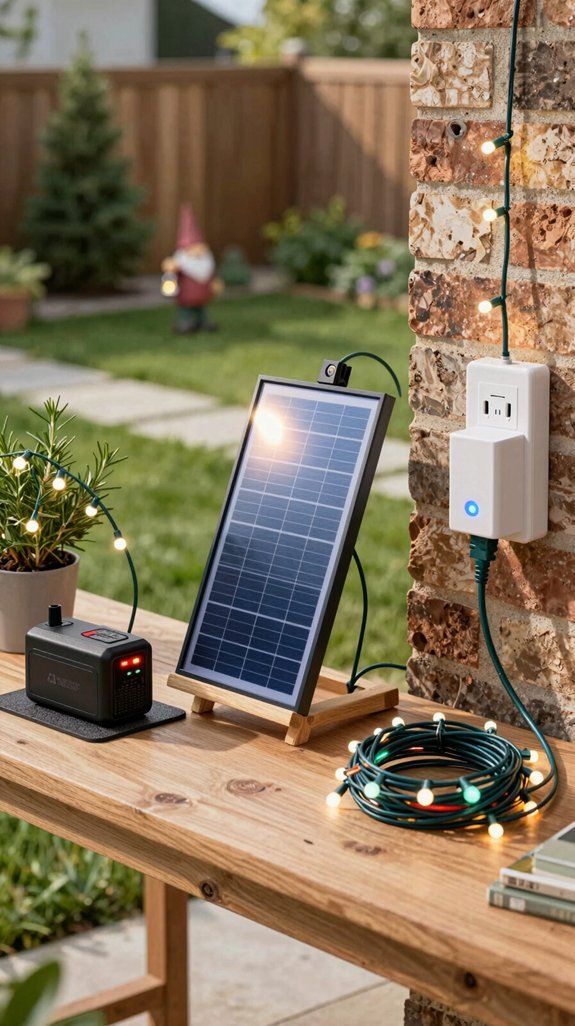
Choosing the right power source for your string lights determines both performance and longevity, so evaluate the options carefully. Plug‑in AC adapters deliver steady voltage, ideal for permanent installations where ambience wiring is hidden. Battery packs offer mobility, but select high‑capacity lithium cells to avoid frequent recharges. Solar panels combine eco‑efficiency with autonomy; pair them with MPPT controllers for optimal energy harvest and consistent brightness. For smart setups, integrate a low‑voltage DC hub that supports PWM dimming and color temperature tuning. Match the source to your layout’s length, wattage, and exposure to ensure reliable illumination and sleek, uninterrupted design. Modern blue interior wall paints can complement your outdoor string light ambience by creating a cohesive color palette between indoor and outdoor spaces.
Set Up a Simple Bluetooth Outdoor Sound System

After selecting a reliable power source for your string lights, you can enhance the ambience with a Bluetooth outdoor sound system that syncs effortlessly with the lighting. Choose a weather‑sealed speaker enclosure with a built‑in amp, then mount it on a sturdy post or under a pergola using vibration‑damping brackets. Connect the speaker to a solar‑charged battery pack, ensuring the pack’s voltage matches the speaker’s input rating. Pair the unit with your phone or smart hub, set a low‑latency codec, and calibrate volume levels for uniform coverage. Integrate a motion sensor to auto‑activate playlists, creating a seamless audio‑visual experience that feels both cutting‑edge and inviting. For outdoor entertainment spaces, maintaining your equipment with appropriate cleaning sprays will keep your speakers and fixtures looking fresh and functioning optimally.
Build a Small Stone Retaining Wall for Terraced Water Features
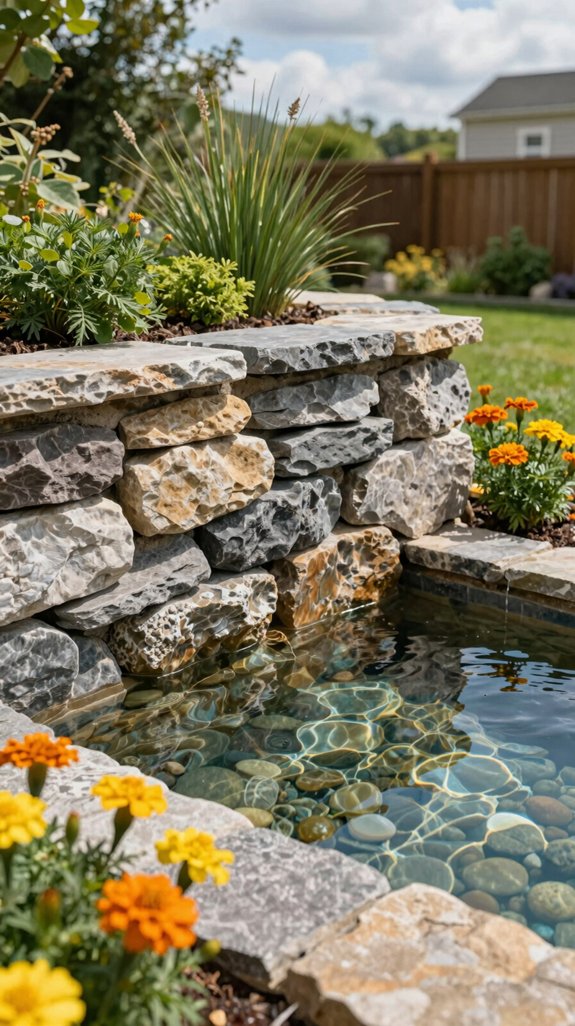
Ever wondered how a modest stone wall can transform a flat backyard into a cascading water oasis? You’ll start by surveying the slope, marking a 3‑foot‑wide trench, and compacting the base with a plate compactor. Choose interlocking basalt or reclaimed fieldstone, then lay a 2‑inch‑thick concrete footing for stability. Stack stones using a dry‑stack technique, inserting stainless‑steel rebar ties every third course for shear resistance. Incorporate a built‑in weir at the top tier, channeling water into successive basins lined with pond‑grade liner. Finish with a brushed‑steel spillway and low‑profile LED strip for night‑time ambience, merging form, function, and innovative design. The slate grey finishes on contemporary spillways complement modern industrial aesthetics while maintaining durability in outdoor water features.
Use Recycled Tires as Modern Planters
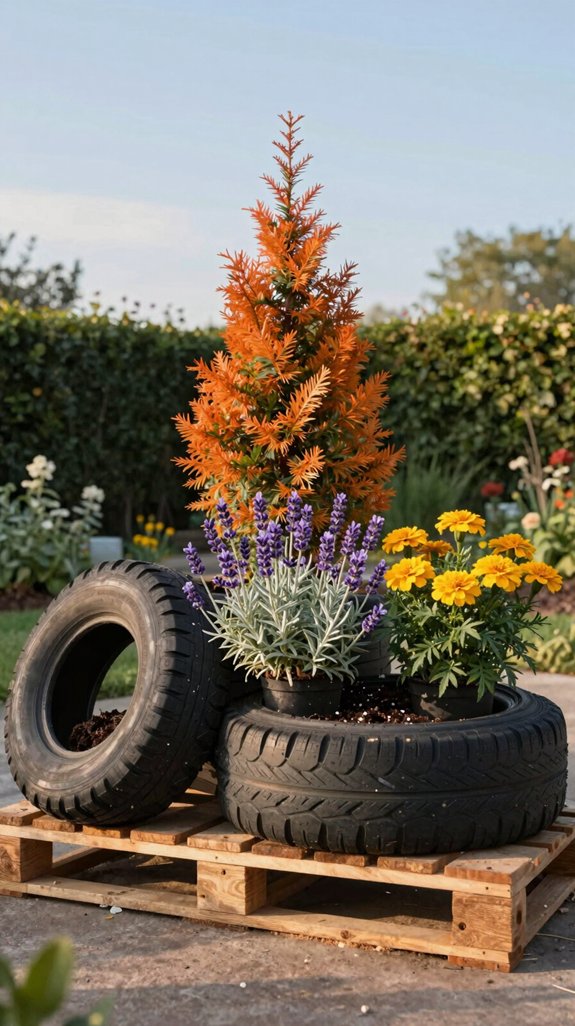
The stone retaining wall you just built creates a natural cascade, and the same design principles can be applied to repurposing tires as sleek, modular planters. First, clean each tire, then cut a vented bottom with a rotary tool to guarantee drainage while preserving structural integrity. Wrap the exterior in weather‑resistant fabric or reclaimed metal mesh for a refined aesthetic. Stack tires in staggered rows, using interlocking brackets to achieve a stable, vertical garden that maximizes limited space. Fill with a lightweight, aerated substrate, plant succulents or herbs, and integrate low‑voltage LED strips for ambient lighting. For an environmentally conscious approach, consider complementing your planter garden with plant-based cleaning solutions to maintain the surrounding landscape sustainably. This approach blends sustainability, form, and function.
Create a DIY Pergola With PVC Pipe for Shade
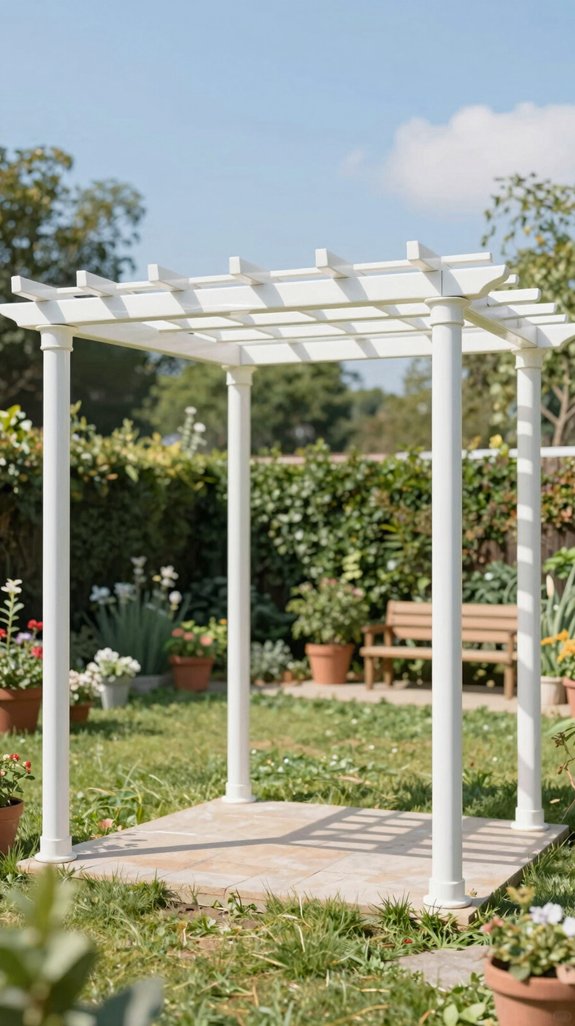
If you want a lightweight, weather‑resistant shade structure that you can assemble in a weekend, a PVC‑pipe pergola offers the perfect blend of strength, simplicity, and visual appeal. Measure the desired footprint, then cut Schedule1‑inch schedule‑40 pipe into four 8‑foot posts, four 6‑foot crossbeams, and eight 4‑foot slats. Use a cordless drill to drive stainless‑steel pipe couplings, securing each joint with PVC cement for rigidity. Attach crossbeams to posts with bracketed hinges, allowing angle adjustments for sun tracking. Slip slats into the top frame, spacing them 6 inches apart to create a lattice that filters light while supporting climbing vines. Finish with a UV‑resistant spray paint for durability and style. For additional design inspiration and ready-made options, consider exploring easy-to-assemble pergola kits that can complement your DIY project with proven architectural styles.
Plant a Mix of Perennials for Year‑Round Color
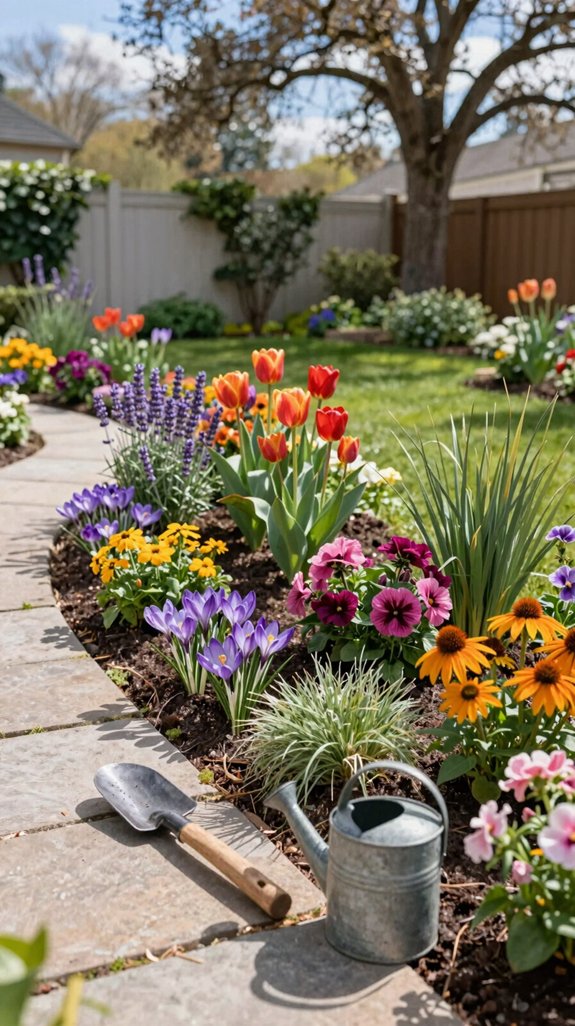
Your new pergola already frames a sunny spot, so filling the space with a carefully selected mix of perennials will keep it vibrant all year. Choose species with staggered bloom cycles—early‑spring crocuses, summer lavender, autumn asters, winter hellebores—to guarantee continuous chromatic flow. Group plants by moisture and sun tolerance, using a layered soil matrix: coarse sand for drainage, composted bark for organic matter, and a light mulch for thermal regulation. Incorporate modular planting pockets to test color ratios, and install a low‑profile drip irrigation timer for precise water delivery. This systematic, aesthetic approach maximizes visual impact while minimizing maintenance.
Hang a Vertical Herb Garden on a Trellis
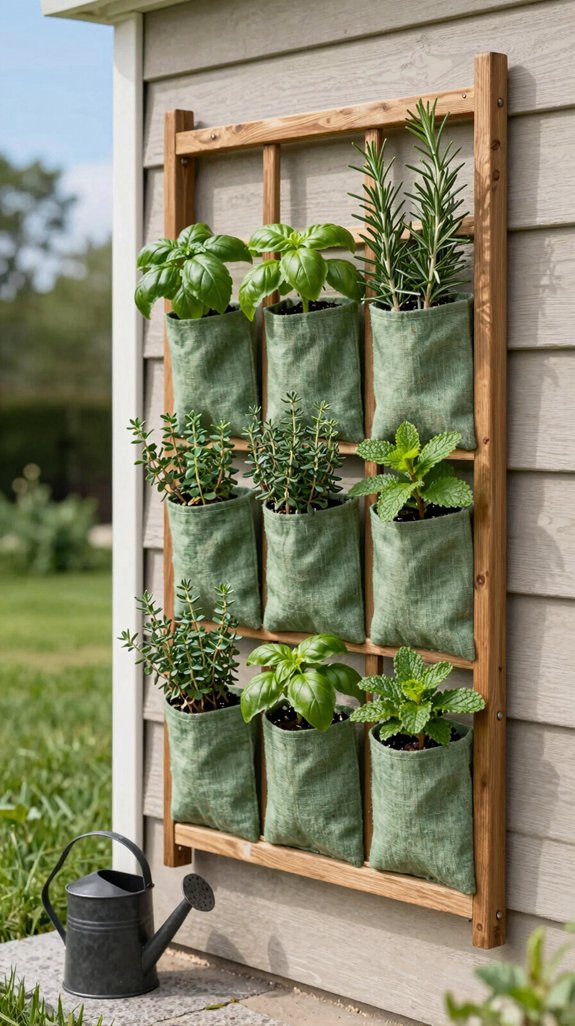
Ever considered turning a simple trellis into a thriving vertical herb garden? Start by selecting a weather‑resistant lattice, then attach modular pocket panels using stainless steel clips for durability. Mount the trellis at eye level, ensuring a 12‑inch clearance for airflow and light penetration. Choose compact, root‑restricted herbs—basil, thyme, oregano, and chives—each in a breathable fabric pot with drainage holes. Integrate a drip‑irrigation line, calibrated to deliver 0.5 gal per hour, and connect to a timer for consistent moisture. Finish with LED grow strips set to 6,000 lux, programmable for day/night cycles, maximizing yield while preserving aesthetic harmony. The layered arrangement of herbs creates visual texture and impact similar to dimensional wall installations, adding depth and interest to your outdoor space.
Incorporate a DIY Rock Garden With Native Stones
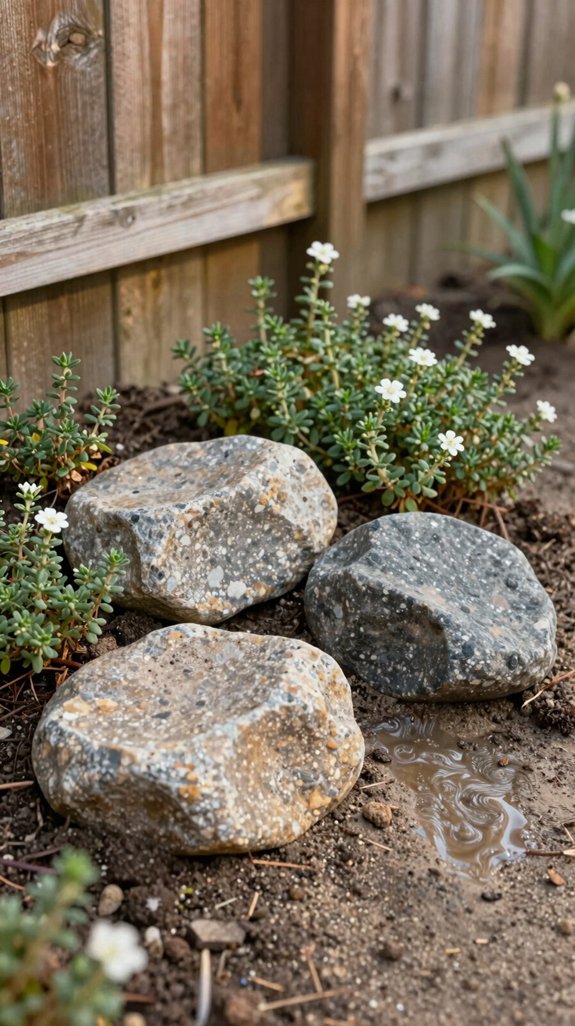
After the herb garden’s trellis is in place, you can enrich the space by arranging a DIY rock garden with native stones. First, map a low‑profile contour using a laser level to guarantee drainage and visual flow. Select region‑appropriate basalt, quartzite, or limestone; their weathered texture integrates with surrounding flora. Position larger boulders as anchor points, then fill gaps with angular fragments, compacting each layer to prevent settlement. Incorporate permeable gravel between stones for moisture control and to reduce erosion. Add hardy succulents and mosses that thrive in rocky microclimates, creating a self‑sustaining, low‑maintenance ecosystem that blends engineering precision with organic aesthetics. Consider complementing your rock garden with duck egg blue painted cottage-style structures or garden accents to enhance the vintage aesthetic of your outdoor space.
Install a DIY Outdoor Shower With a Simple Pipe System
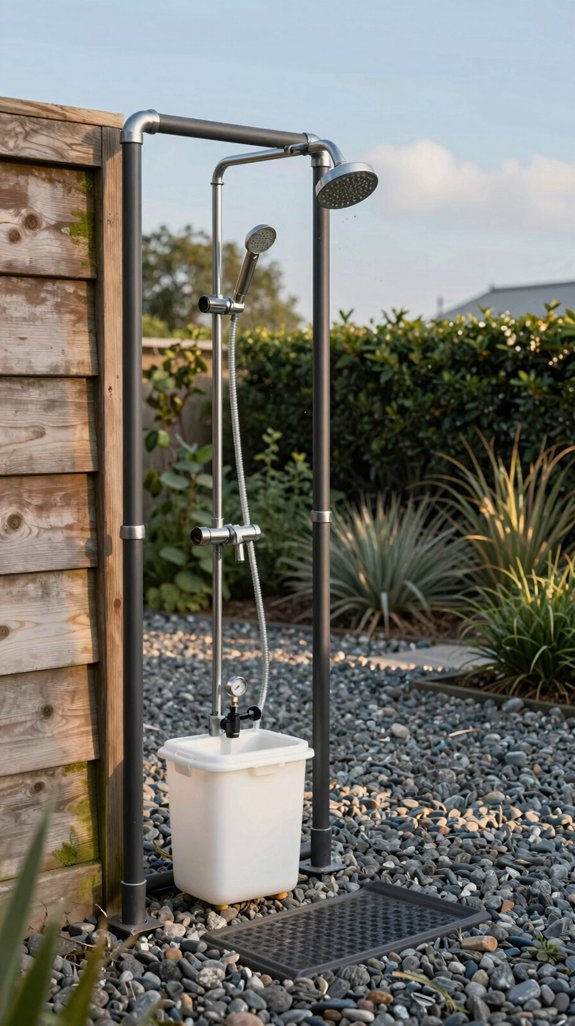
How can you turn a modest backyard corner into a sleek, water‑saving shower without digging deep trenches? Begin with a pressure‑balanced faucet, connect a ½‑inch PVC pipe to a garden hose, and route it through a shallow trench lined with sand for drainage. Install a pre‑fabricated shower pan on a raised platform of reclaimed wood, then attach a stainless‑steel wall panel with built‑in water‑resistant LED strips for ambience. Use a quick‑connect valve to regulate flow, and add a solar‑powered pump for eco‑efficiency. Finish with a frosted glass screen to conceal piping while maintaining visual lightness. This system delivers functional elegance, low‑maintenance operation, and innovative sustainability. For the drainage area surrounding your shower base, grout brushes can help maintain clean grout lines and prevent debris accumulation in the pan’s perimeter.
Build a Small Outdoor Kitchen With a Portable Grill & Counter
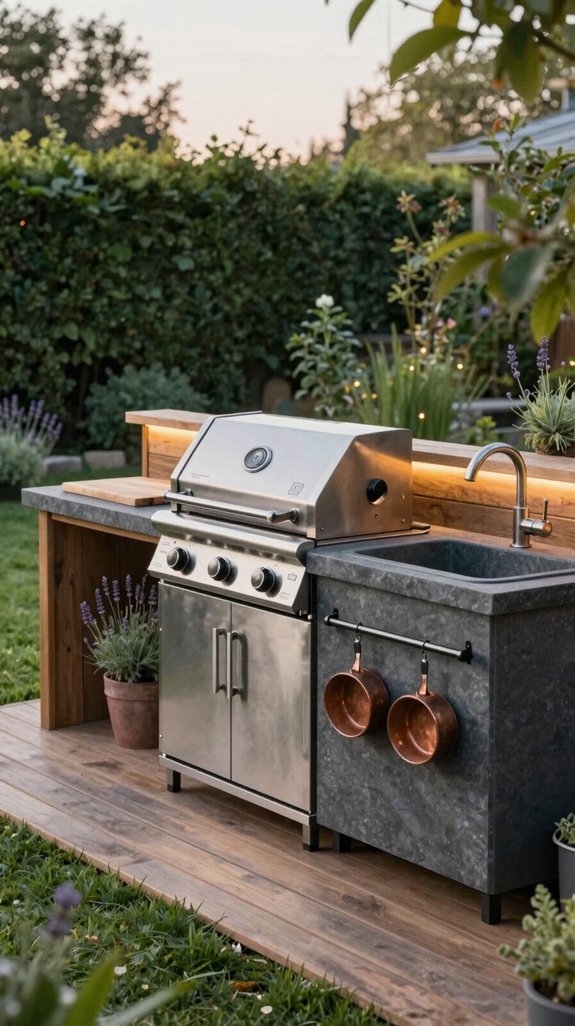
If you want a compact, high‑impact cooking zone, start by positioning a sturdy, weather‑resistant countertop on a pre‑treated concrete pad and mount a portable grill with a quick‑connect gas line beneath it; the counter’s integrated storage drawer can hold utensils, spices, and a compact sink, while a detachable side table provides prep space, and a simple drip‑edge liner beneath the slab guarantees water runoff won’t damage the surrounding soil. Choose a slab with brushed steel finish for visual continuity and embed LED strips for ambient lighting. Route power through a weather‑sealed conduit to a low‑profile outlet. Install magnetic knife strips on the backsplash, and use modular shelving to adapt storage as needs evolve. Consider complementing your outdoor kitchen with low-profile seating options to create a cohesive entertaining space. The result is a sleek, functional hub that maximizes limited space while delivering professional‑grade performance.
Add Decorative Boulders to Define Zones and Add Visual Interest
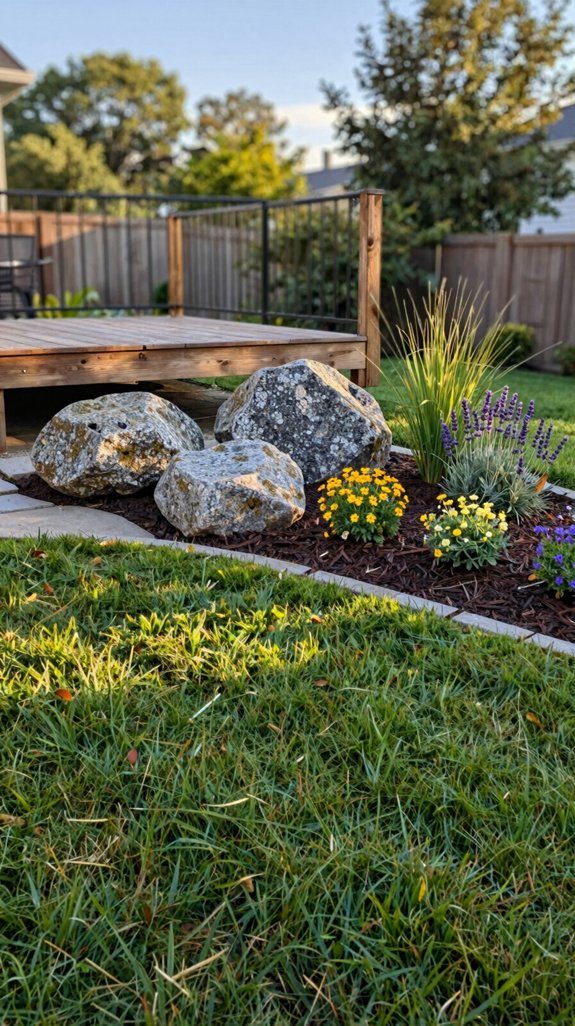
The outdoor kitchen’s sleek countertop sets a clean anchor, and adding decorative boulders around it instantly carves distinct zones while boosting visual appeal. Choose boulders with varied textures and muted hues to complement existing materials; position them strategically to delineate cooking, dining, and lounging areas without obstructing traffic flow. Anchor each stone using a concrete footing and geotextile fabric to prevent settlement and erosion. Incorporate low‑profile lighting beneath the boulders for subtle illumination and nighttime safety. By grading the surrounding soil, you create gentle ramps that guide water away from the kitchen, enhancing drainage while preserving the aesthetic continuity of the landscape. Consider pairing your boulder arrangement with stylish pillow sets on nearby seating areas to tie together your outdoor design scheme.
Install a DIY Rain Garden to Manage Stormwater & Attract Wildlife
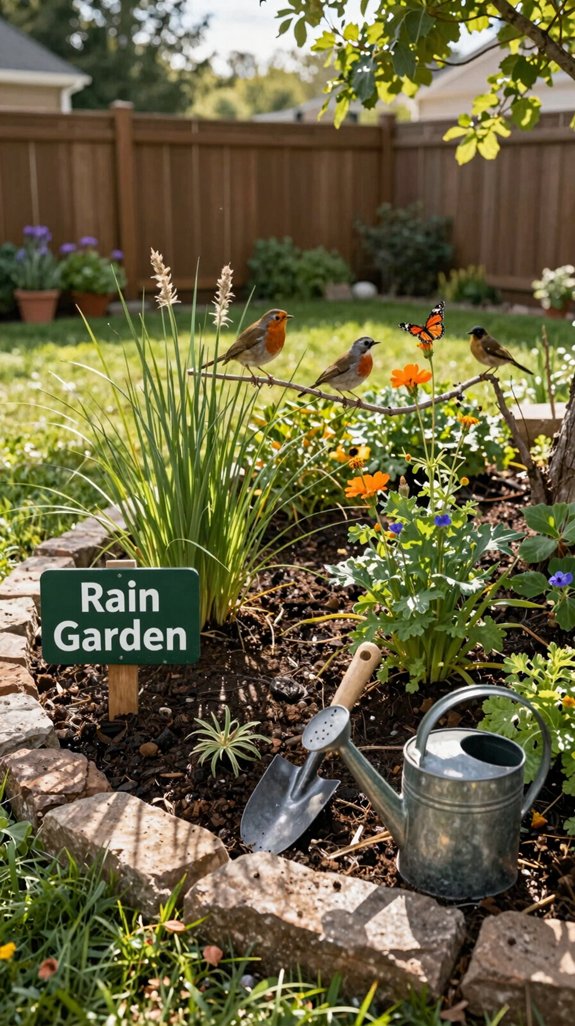
While rainwater pools in low‑lying spots of your yard, a DIY rain garden can capture runoff, filter pollutants, and create a vibrant habitat for pollinators. Begin by mapping a shallow basin, 6‑12 inches deep, lined with permeable geotextile. Choose native, water‑tolerant perennials—e.g., *Echinacea*, *Sedum*—and arrange them in tiered clusters for visual depth. Incorporate a coarse mulch layer to retain moisture while preventing erosion. Install a discreet inlet pipe that directs stormwater into the garden, and a low‑flow outlet for excess drainage. This engineered oasis reduces peak flow, improves water quality, and invites bees, butterflies, and birds. Consider pairing your rain garden with zero waste cleaning supplies to maintain the surrounding landscape without introducing chemical runoff that could compromise the ecosystem you’ve created.
Craft a Personalized Sign or Stenciled Stepping Stones
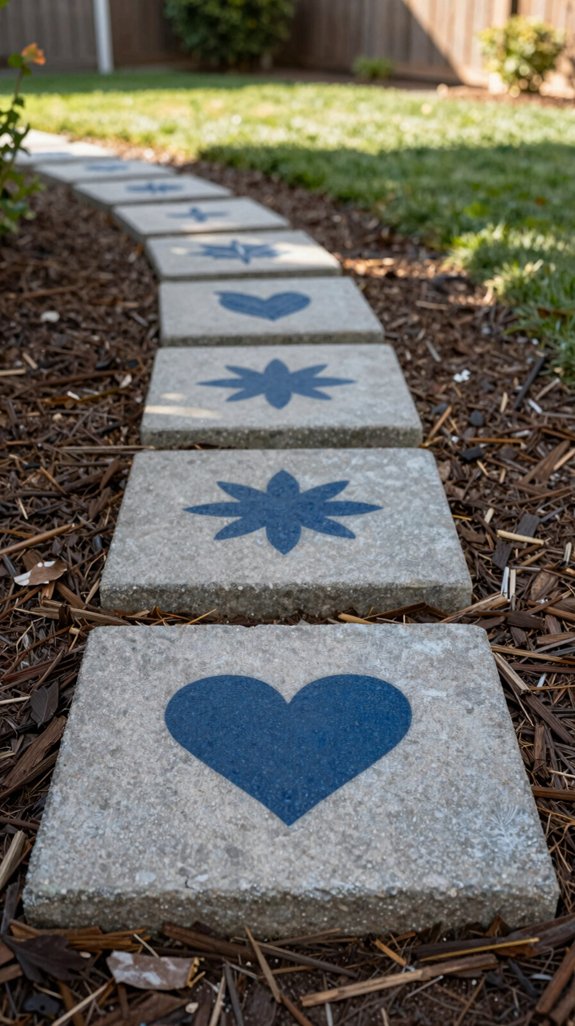
Rain gardens already add texture and ecological value, so extending that custom feel to the pathway can enhance both visual cohesion and personal expression. Choose a durable, weather‑resistant material—concrete, polymer, or reclaimed stone—and sketch a design that mirrors the garden’s palette and geometry. Mix a high‑strength mortar with a pigment additive for subtle hue integration, then embed a pre‑cut stencil of your monogram, quote, or botanical motif. Apply a thin, clear epoxy sealant to protect against moisture and UV degradation. Position each stone at a comfortable stride length, aligning edges for smooth foot traffic while showcasing your artistic signature throughout the landscape. If you have pets that frequent your garden, ensure all materials and sealants used are pet safe cleaning solutions to protect their health and safety.
Frequently Asked Questions
Can I Use Reclaimed Wood for the Deck Border Without Treating It First?
Yes, you can use reclaimed wood for the deck border without pre‑treating it, but you’ll want to seal it promptly with a UV‑resistant, water‑repellent finish to guarantee durability, aesthetic consistency, and structural integrity.
How Deep Should the Rain Garden Be for Effective Stormwater Drainage?
You should excavate the rain garden to a depth of 12‑18 inches, grading it with a gentle 1‑2 % slope, ensuring the bottom’s a permeable mix of sand, compost, and topsoil for optimal stormwater infiltration.
What Is the Best Way to Anchor the Hammock Stand on Sloped Terrain?
Secure the hammock stand by anchoring a weighted base into the slope, using a ground screw or auger with a steel plate, then tension adjustable straps to the ground, ensuring stability and aesthetic integration.
Do I Need a Permit to Install a Small Stone Retaining Wall?
You’ll usually need a permit if the wall exceeds four feet, supports a slope, or alters drainage; check local building codes, submit plans, and obtain approval before you start constructing.
Which Native Plants Thrive in a Rock Garden With Minimal Watering?
You’ll thrive with Sedum, Artemisia, and dwarf Lavandula—low‑maintenance, drought‑tolerant natives that cling to stone, add texture, and keep water use minimal while delivering striking, innovative garden aesthetics.